






Tap and hold the QR code, and select Add eSIM. Alternatively, you can use the Camera app to scan the QR code.

On the following screen, follow the prompts to install the new Data Plan. The default options are okay to accept.

Once the new Data Plan has been added, make sure that Data Roaming is set to ON in your phone's Settings.
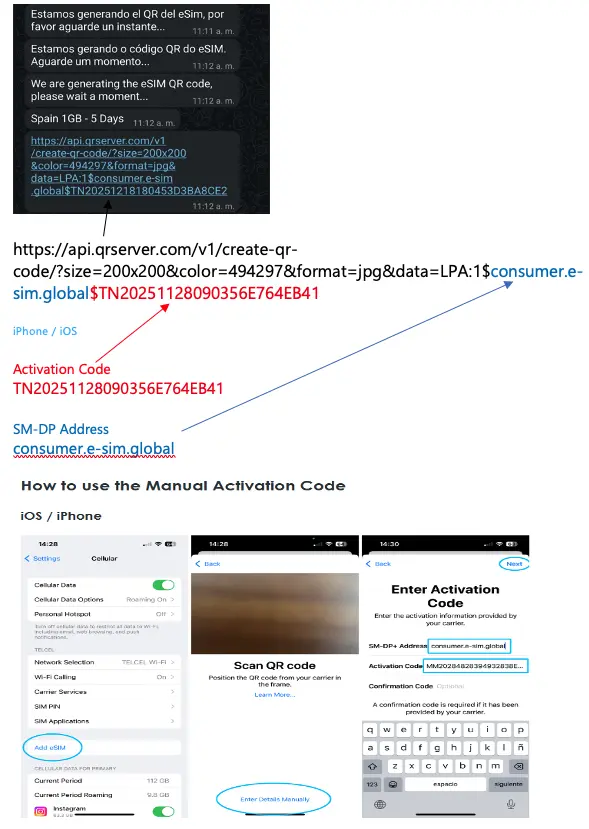
Open Settings and go to Cellular (It may be called Mobile or Mobile Services)
Under Cellular Plans, tap Add eSIM. Your phone's camera will open.
Tap Enter Details Manually near the bottom of the camera screen.
- Enter the SM-DP+Address shown in your account.
- Enter the Activation Code shown in your account.
- Do not enter a Confirmation Cod. It's not required.

Tap Next in the top right and follow the prompts to continue the eSIM installation.



On the device where you want to install the eSIM data plan, open the Camera app.

Point the camera at the QR Code. Tap on the notification that appears, which should say Data Plan.

On the following screen, follow the prompts to install the new Data Plan. The default options are okay to accept.

Once the new Data Plan has been added, make sure that Data Roaming is set to ON in your phone's Settings.
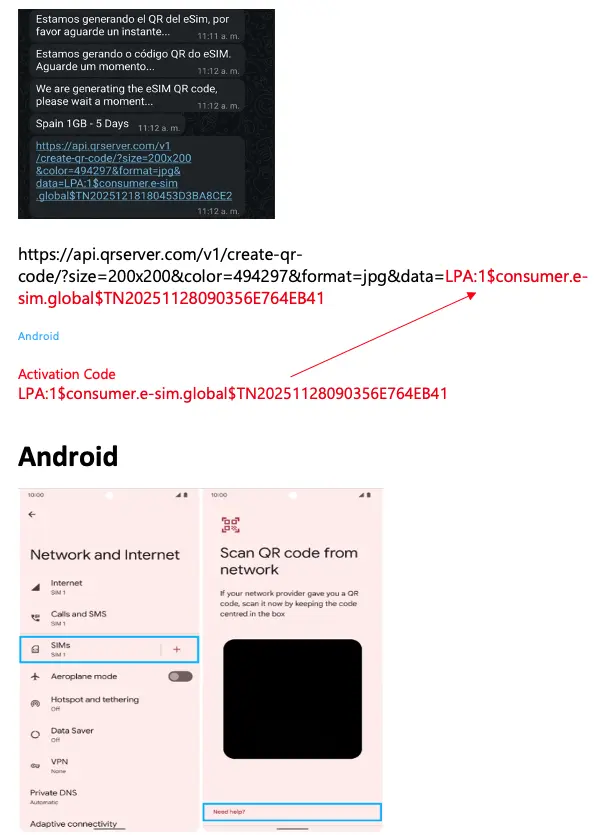
Open Settings and go Network and Internet.
Look for SIMs and tap the + icon.
Tap Download a SIM instead? near the bottom of the screen.
On the message that appears, tap Yes, then tap Next. The phone's camera will open.

Tap Need help? at the bottom of the screen.

On the "Help adding a network" screen, underneath "Having trouble scanning your QR code", you can tap Enter it manually.

Now enter the manual activation code you received at the time of purchase into the Sofyy WhatsApp application.

Follow the steps on the screen to confirm the new data plan.